Contents
Moving a site from localhost (computer) to hosting can be confusing sometimes for beginners. Therefore, the developers have created a plugin that makes things easier.
Namely, this is not only switching from computer to hosting, but also from hosting to hosting. The procedure is exactly the same.
Home page
Installation of the Duplicator plugin
First of all, you need to install the plugin and activate it.

After you have activated it, you need to click on the newly installed and activated Duplicator plugin on the left side, an icon will appear.
Creating a backup
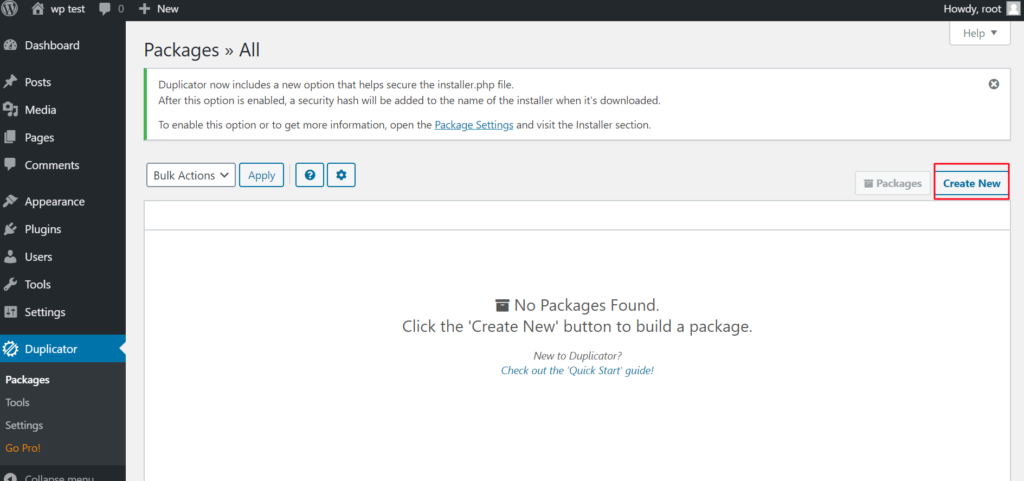
After the page opens, as shown in the picture, you need to click on Create New marked in red, it means creating new files for transfer.
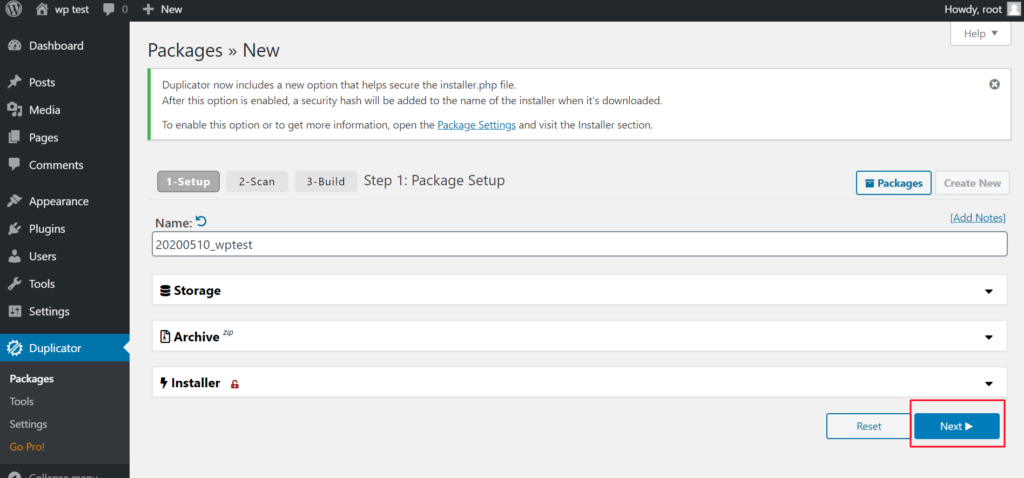
In this case, we simply go to Next, where it will appear for us to scan the site as in the picture below.
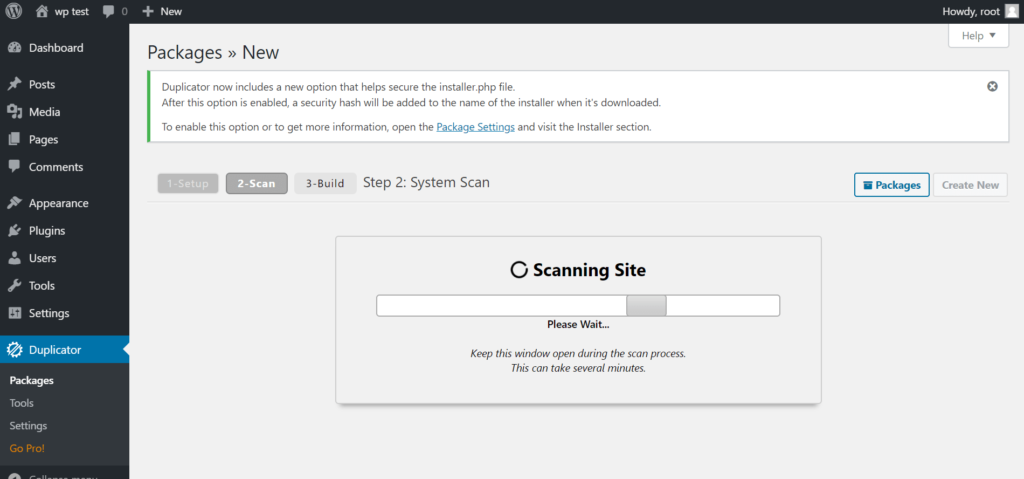
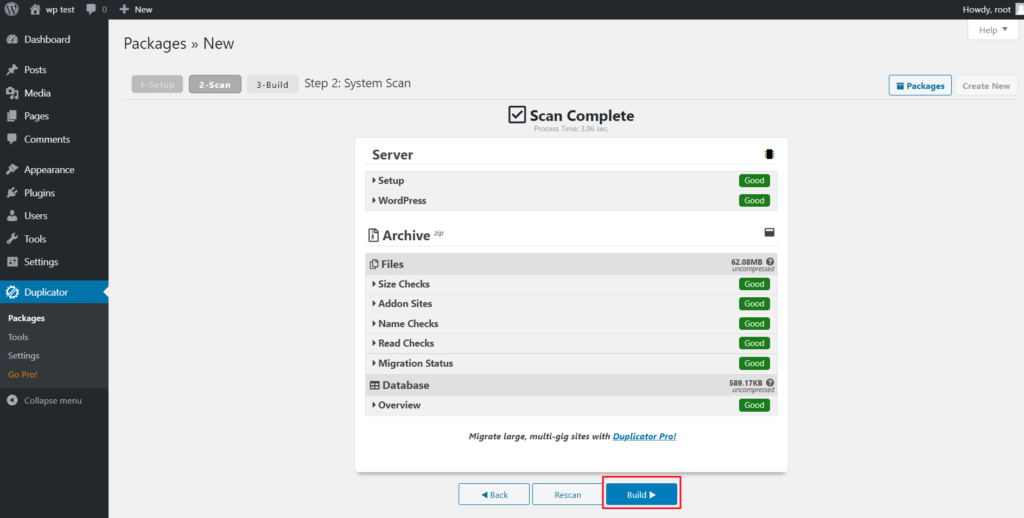
After the scan is complete, it should look like this. What matters is that everything is green. After which we click on the blue button.
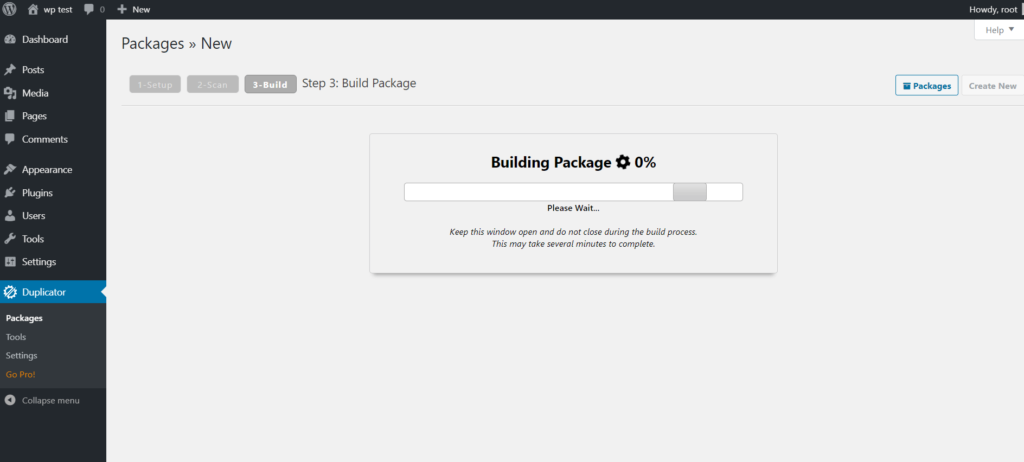
At this moment, a backup file is created for us, which is used to transfer the site to hosting. And upon completion you get the image below.
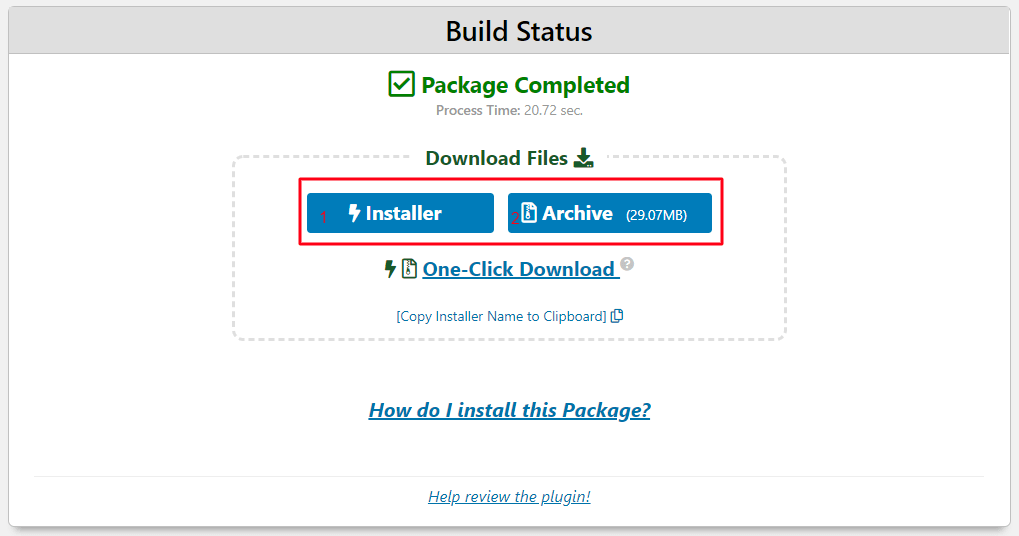
In this step you need to download both files and the file Installer and file Archive. You download them by clicking both buttons and downloading them one by one.
On hosting
Creating a database
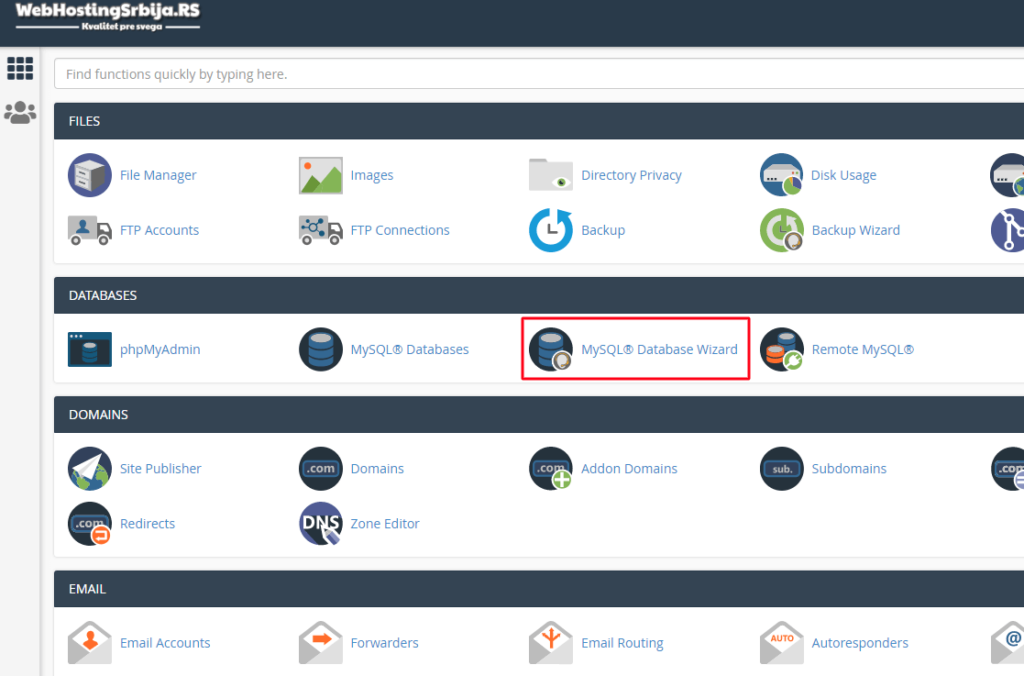
Here goes the most difficult part of this guide, which is logging into cPanel and clicking on the icon that is framed in red. After which you get an option like the image below.
Note: You need to write these three items down in your computer because you will need them later.
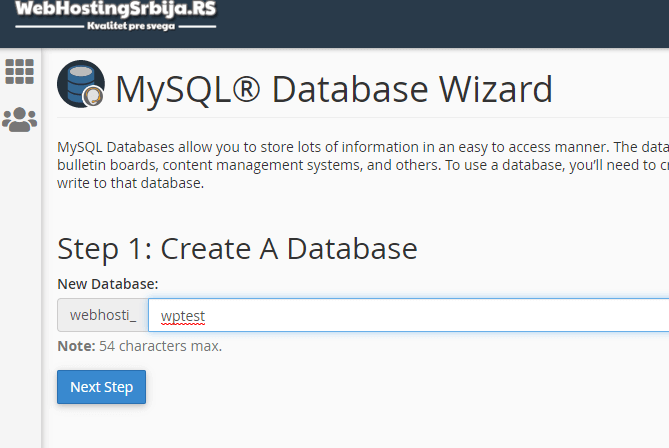
Here you need to enter the name of the database and do not use words like database or trial or wptest. You can already use something unique and not so logical. After you have entered click on Next Step. And the next step is to create a user for that database as in the picture below.
Creating a database user
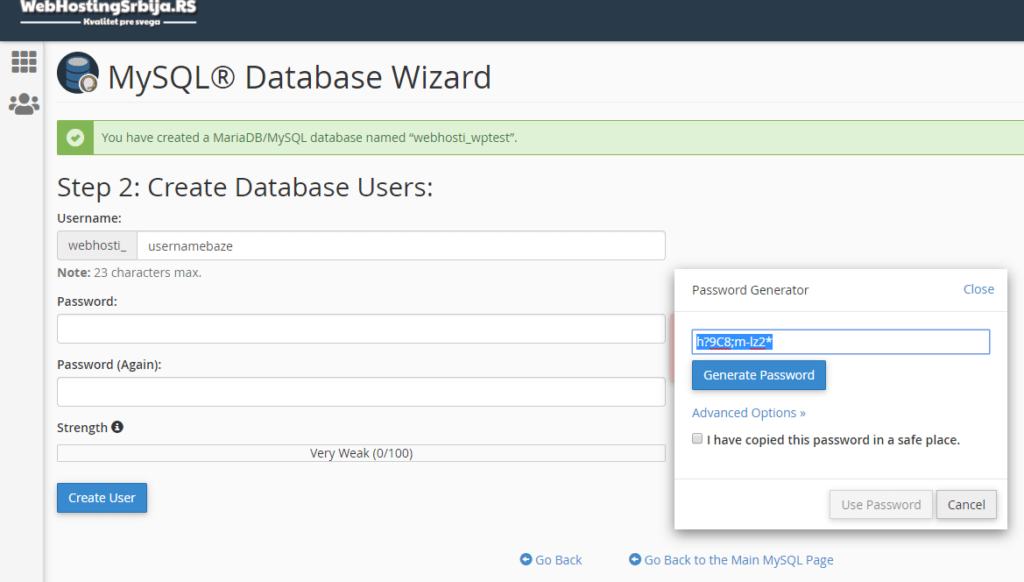
When you have created the database, it is time for the user. Also apply the rules above that you don't use anything test samples and the like but something unique and not so logical. To create a password, I strongly recommend that you use the Password Generator as shown in the picture and that you copy and enter that password in the fields on the left.
The reason for this is because cPanel generates a really reliable and strong password for you that will further protect your site from hackers.
After creating, click on Create User.
Setting permissions
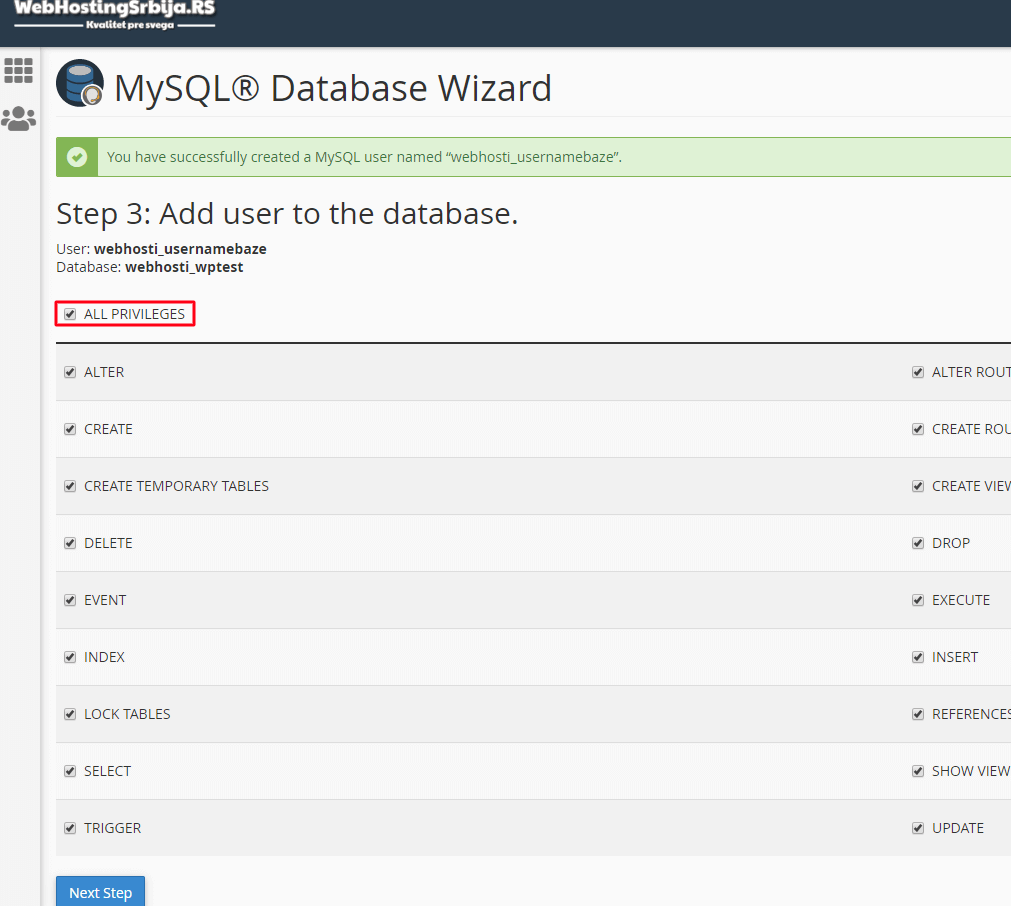
Now here we assign the user to our database that we have created and allow him everything that is necessary for the site to function. Check ALL PRIVILEGES and click Next Step.
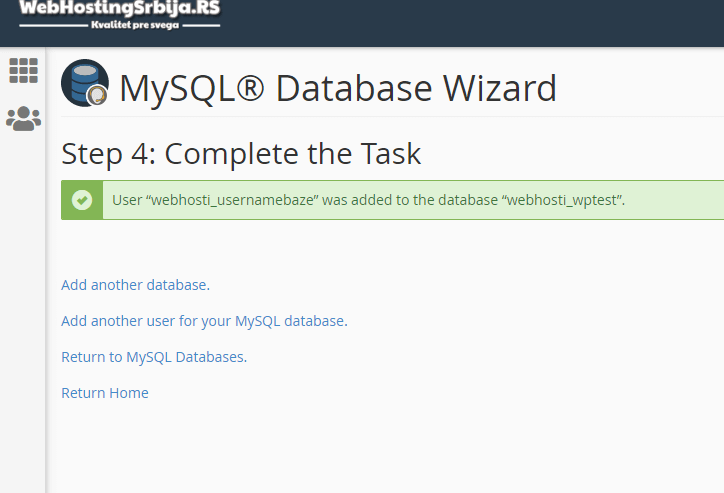
That's it. The hardest part of this tutorial is over. Note that you need to save these three things because you will need them in the next step.
Now we need to upload the files that we downloaded a little earlier via the duplicator plugin.
Placing duplicator files on hosting
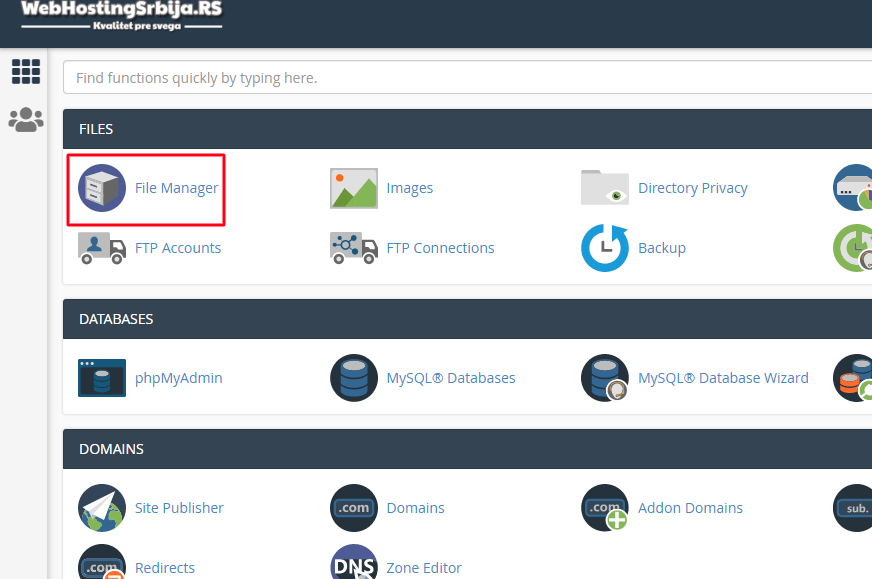
We do this by going back to the cPanel home page and clicking on File Manager. As in the picture below.
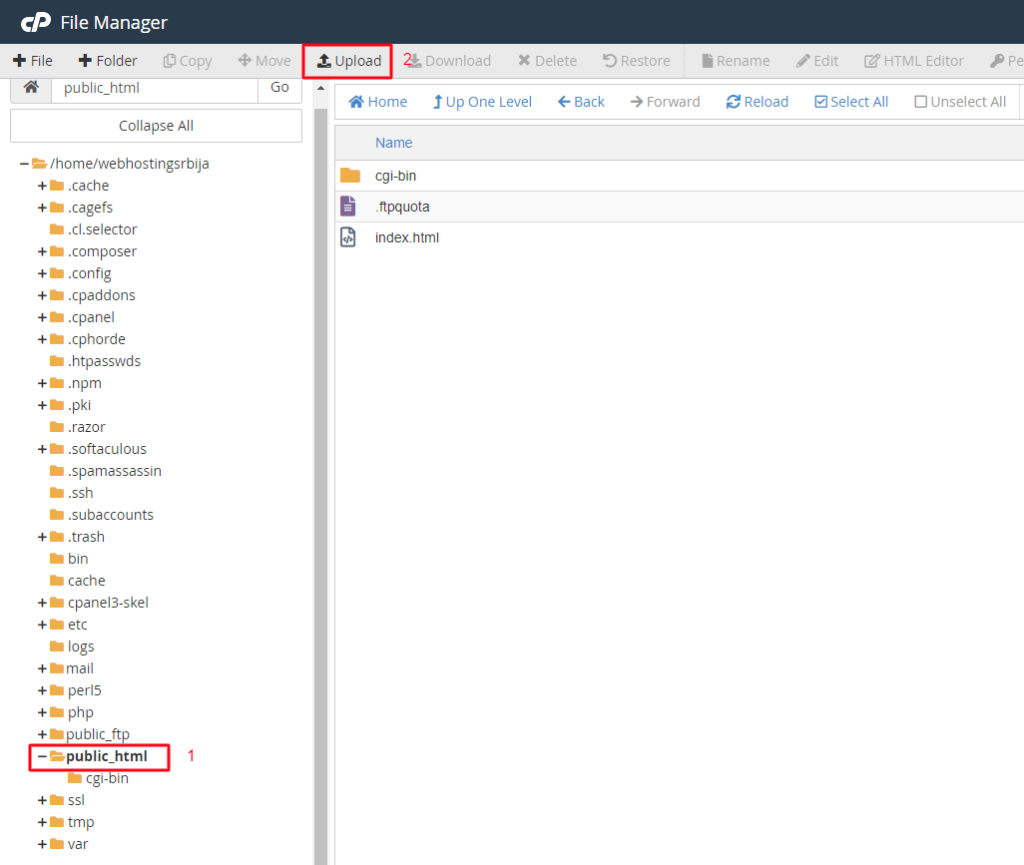
After which we need to click on the folder first public_html (and if it is an Addon Domain, then in the folder of that domain) and then on the button upload. As in the picture below.
After we have clicked in the new tab, we will be able to upload those files. Which we do by selecting the files and uploading them.
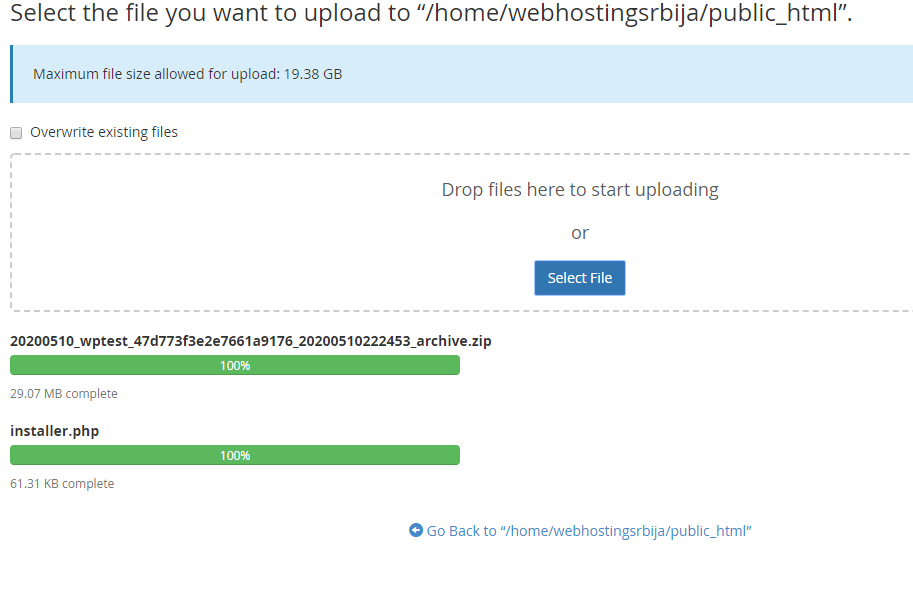
After the upload is complete, we need to open the file we uploaded, which is installer.php. We do this by entering your domain with a slash and the file name installer.php in the address line of your browser (example: webhostingsrbija.rs/installer.php)
Starting duplicator import
When we do that, something like the picture below will open.
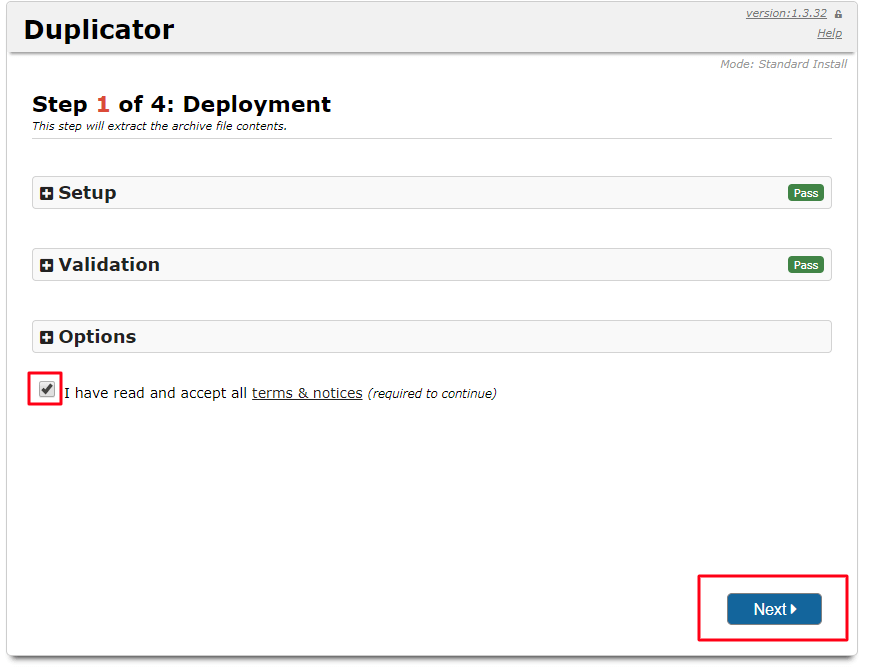
Great now you need to tick the terms of use and click the Next button. Note that setup and validation must be green. And after clicking you will get some time depending on the size of the site as in the picture below.
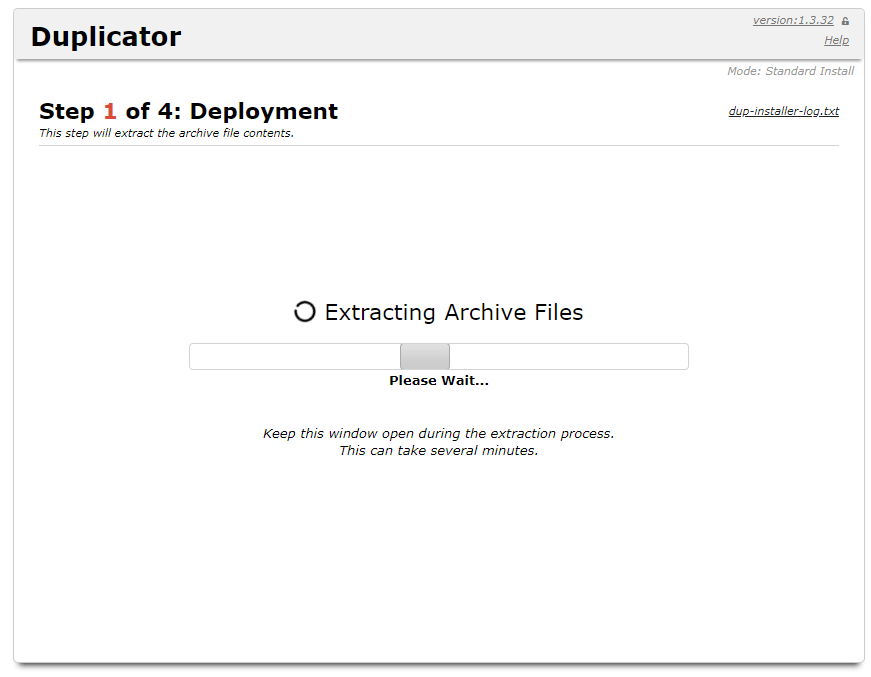
Now that that's done, it's time to use those database-related data that we saved in, say, notepad and copy them here. The data we copy is the database, the database user and the password for the created user.
If you haven't saved that data, you can find it in cPanel > MySQL Databases, and you can create a password on the same page, but at the very bottom of that page.
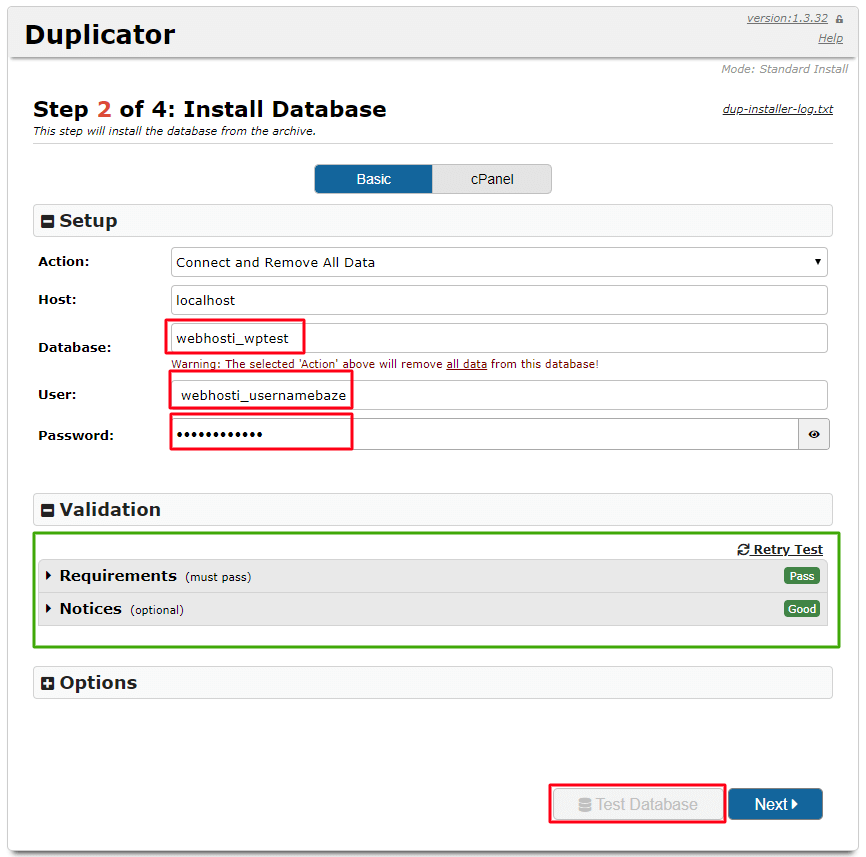
Now that you have filled in you need to click on Test Database and you will see Validation framed in green where you must get a green result. After turning green, click Next.
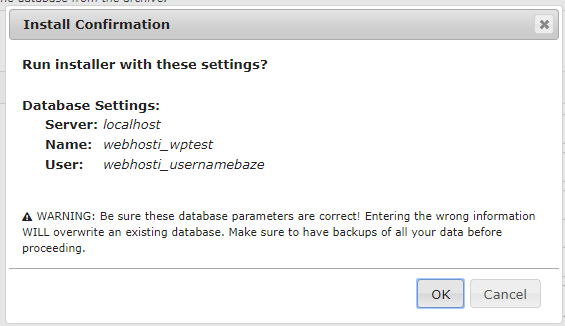
Here you get a small popup where you need to confirm with OK.
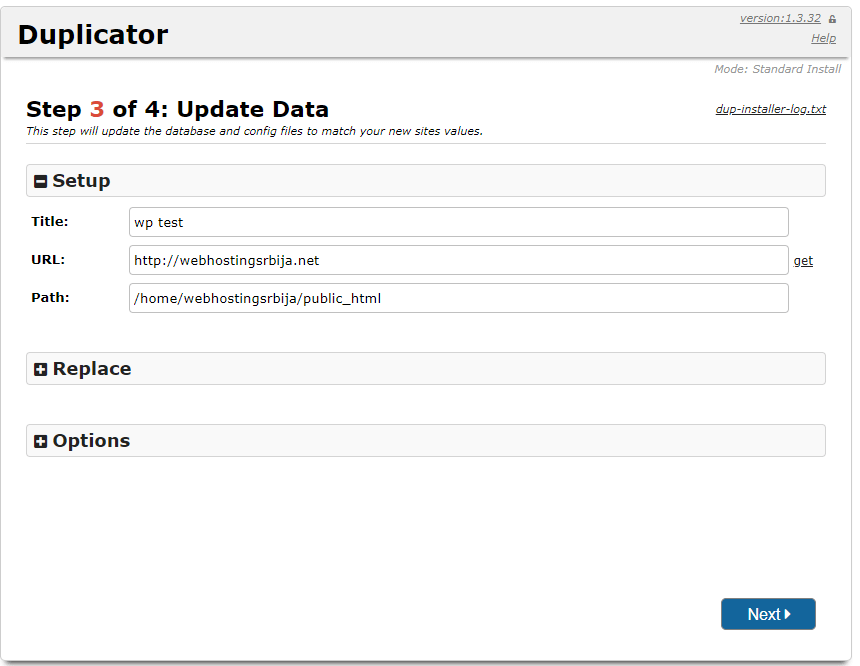
In this step, the basic data of the new site is set. Here, the plugin automatically changes the site url from localhost to the domain you use (if it is http://, set it to https:// because you have enabled SSL, which you get with us for free and automatically). We click on the Next button.
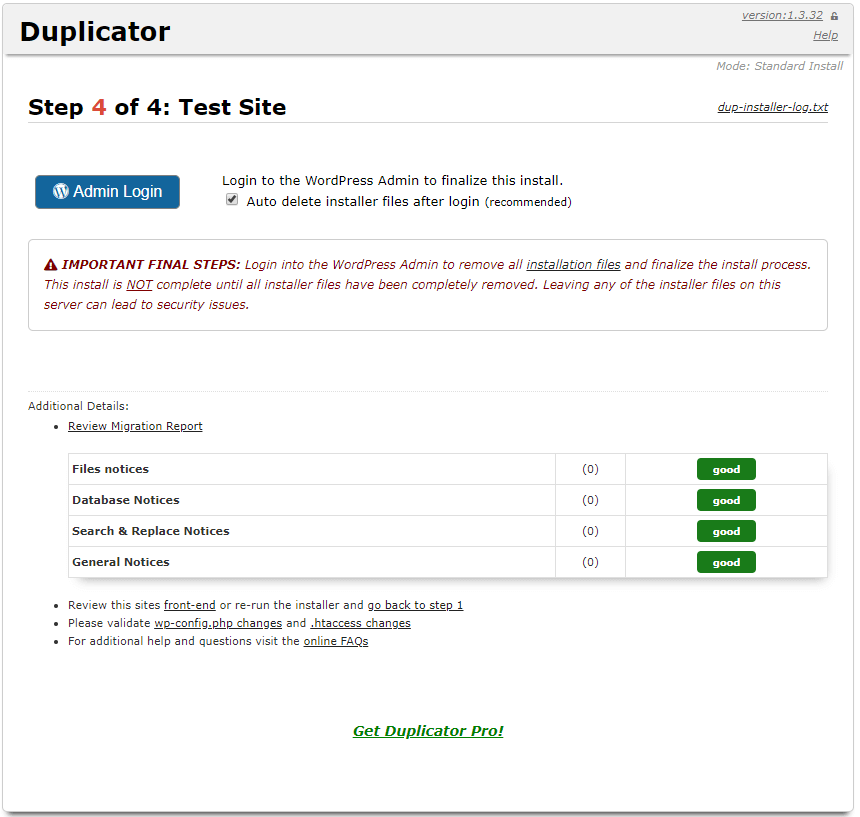
Awesome. You have successfully transferred the entire site and now you can log in to your site with the new domain.
After this you need to delete the plugin because any plugin you no longer use is highly recommended to be deleted, the same goes for the theme.

