FTP accounts allow you to connect to your hosting files via FTP programs such as FileZilla, Cyberduck or WinSCP. They are ideal for larger or frequent file transfers, while the built-in File Manager is more convenient for quick small changes.
1. Overview
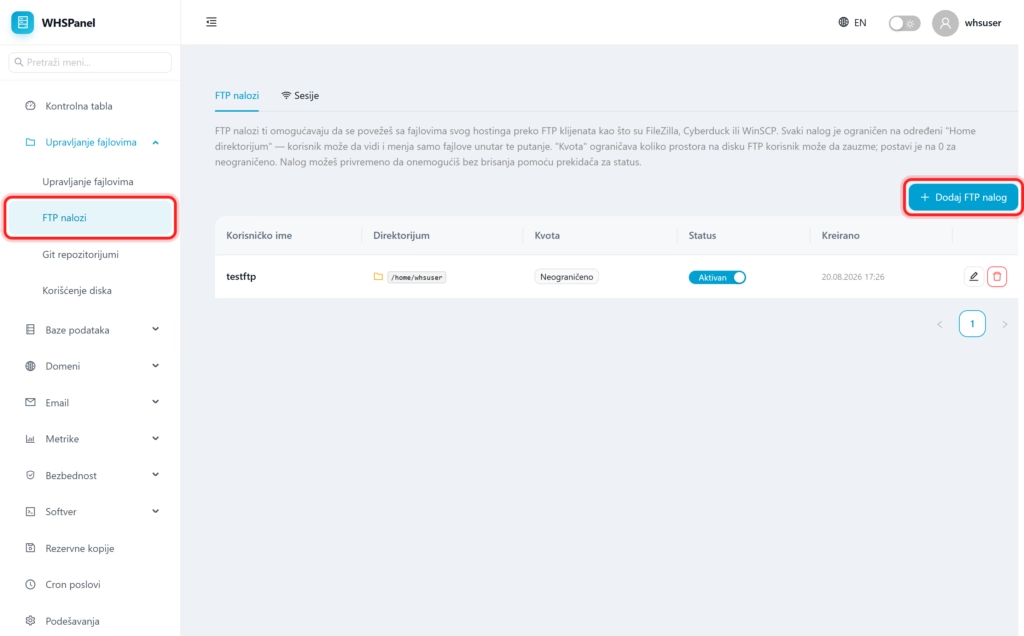
In the left menu, open File management well FTP accounts. You see two cards: FTP accounts (list of orders) and Sessions (currently active connections). In the table is each account with columns Username, Directory, Quota, Status and Created, and on the right side are actions.
2. How to create an FTP account
- Click Add FTP account.
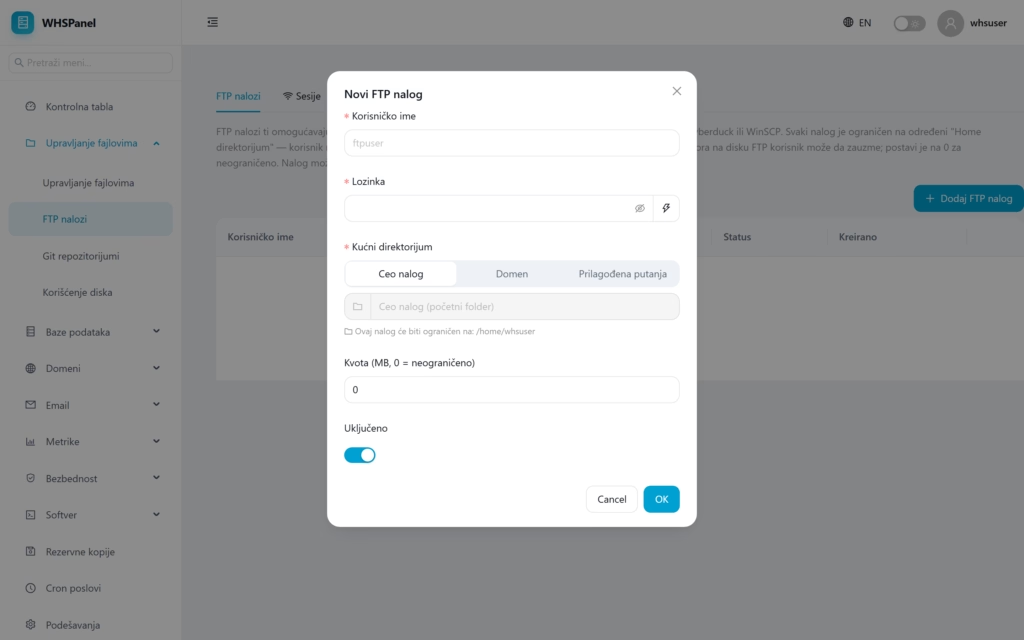
- Username and Password (can be auto-generated by clicking the lightning bolt icon).
- Home directory: as long as the account has access. Entire account, Domain or Custom path.
- Quota (MB): how much space the account can take (0 = unlimited).
- Click OK.
3. Account actions
In each order line are:
| Element | What does it do? |
|---|---|
| Status (switch On / Off) | Temporarily disable your account without deleting it, then re-enable it later. |
| Edit (pen) | Changes account settings (eg quota or password). |
| Delete (bucket) | Permanently removes the FTP account. |
4. How to connect (FileZilla)
- Open FileZilla and enter Host (server address or your domain).
- Username and Password are the data of the FTP account you created.
- Port:
21. - Click Connect. When you connect, you can see your account files on the right side.
On the card Sessions at any time you can see who is currently connected via FTP.
Security: create a separate FTP account for each contributor and restrict it to the exact folder via the "home directory". When cooperation stops, turn it off with the switch or delete it.