Git repositories allow you to version your site code directly on your hosting account. You can create an empty code push repository or clone an existing one from GitHub, GitLab or any Git server, with the option to automatically publish the site with each push.
1. Where Git repositories are located
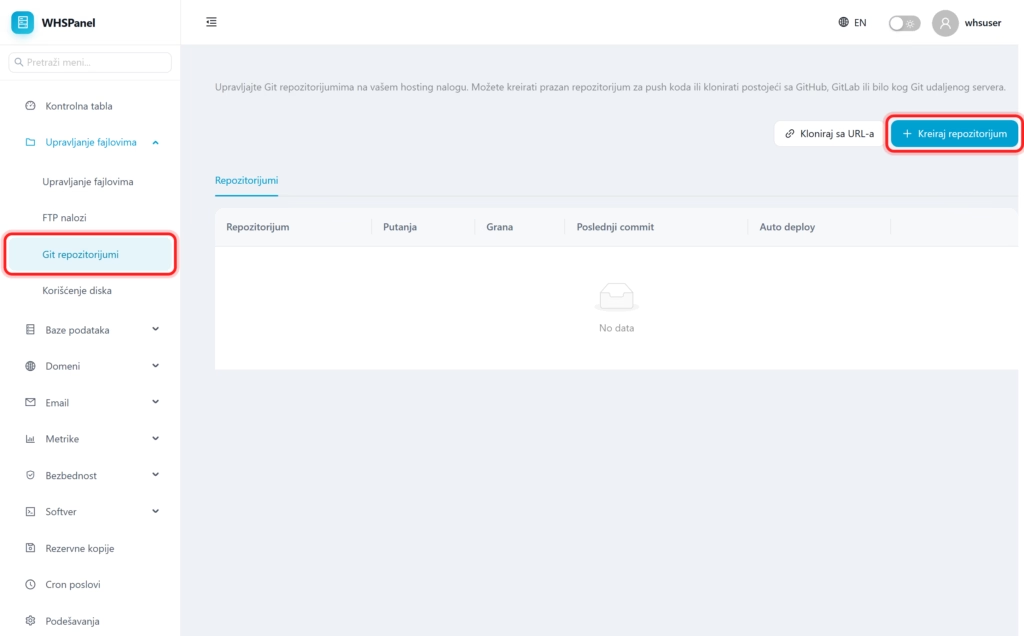
In the left menu, open File management well Git repositories. At the top right are two buttons: Clone from URL (for quick download of existing repository) i Create a repository.
2. How to create a repository
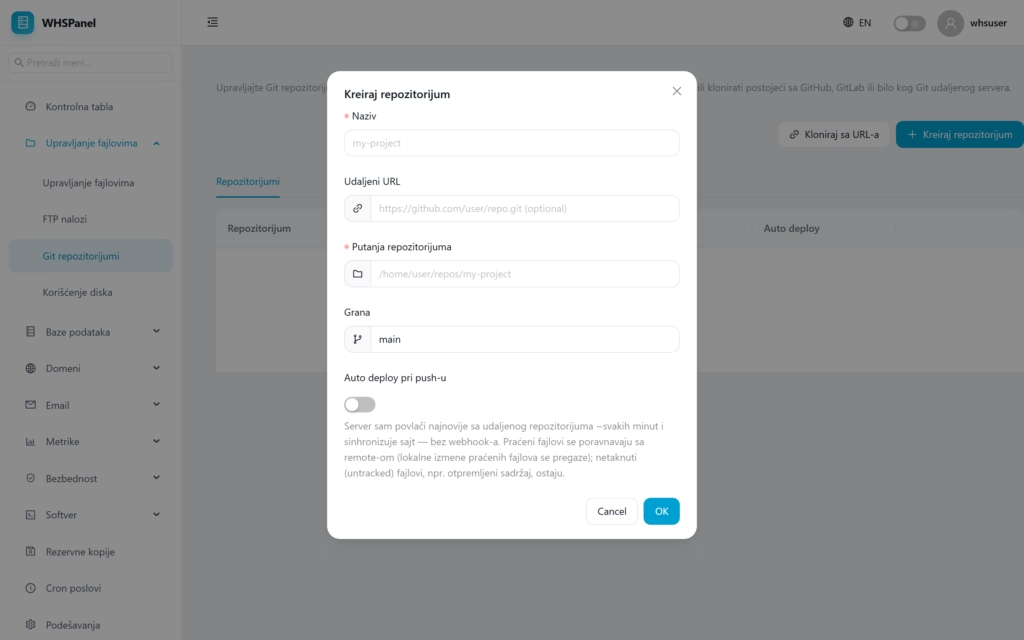
- Click Create a repository.
- Name: repository name (for example
my_site). - Remote URL: leave blank for an empty repository, or paste an address (for example from GitHub) to download the existing code immediately.
- Repository path: where on the account the repository is located.
- Branch: by default
main. - Auto deploy on push: turn on if you want the site to refresh automatically (explained below).
- Click OK.
3. Automatic deployment (auto deploy)
When enabled, the server itself pulls the latest version from a remote repository approximately every minute and syncs the site, without the need for a webhook. Tracked files are committed to the remote repository, and files that Git doesn't track (such as uploaded content and images) remain untouched.
Watch out: auto deploy overwrites local changes to tracked files on the next pull. Therefore, change the files under Git control through the repository (commit and push), not manually on the server.
4. What does the table show?
| Column | Meaning |
|---|---|
| Repository | Repository name. |
| Path | Where is it located on the order?. |
| Branch | Active branch (eg main). |
| Last commit | Last downloaded change. |
| Auto deploy | Whether auto-publishing is turned on. |