Cloudflare stands in front of your site and provides a global CDN, DDoS protection and acceleration. When turned on, visitor traffic is routed through the Cloudflare network before reaching your server. In WHSPanel, you connect the domain to Cloudflare via an API token and manage the settings per domain.
1. Overview
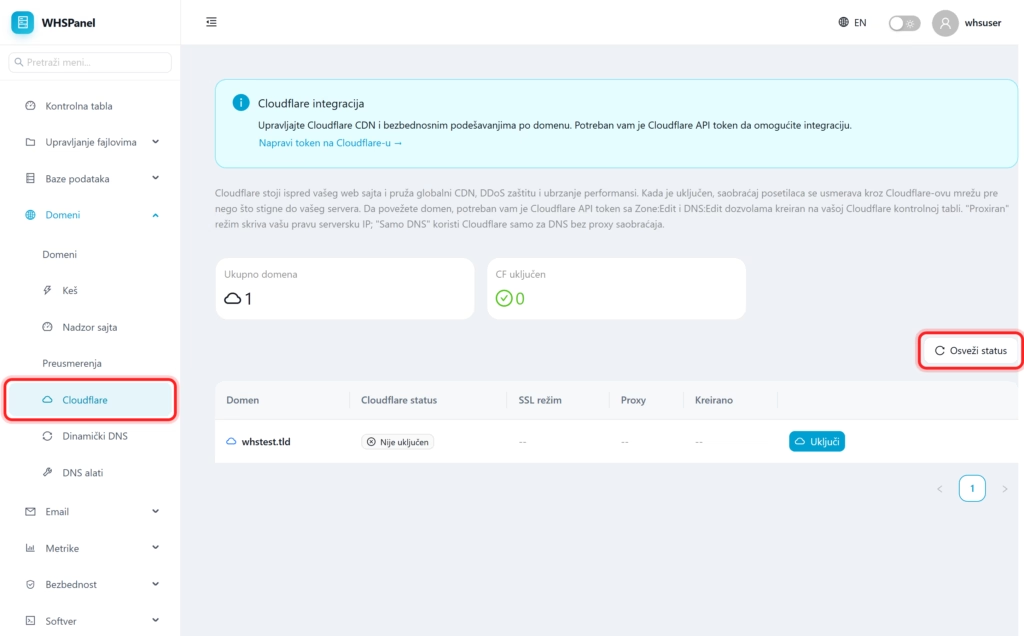
Open in the menu Domains well Cloudflare. The tabs show how many domains you have and how many are connected to Cloudflare. In the table for each domain, you can see the status, SSL mode and whether the proxy is enabled.
2. How to connect a domain
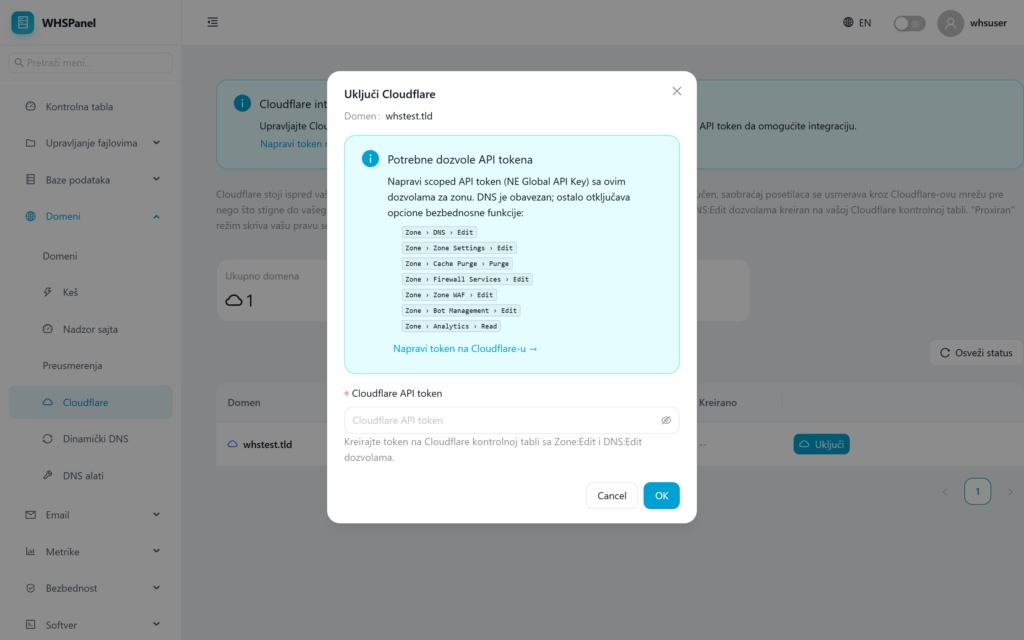
You need it. scoped API token (not the Global API Key) created in your Cloudflare dashboard. The token should have zone permissions (DNS is mandatory, the rest unlocks additional features):
- Zones → DNS → Edit
- Zone → Zone Settings → Edit
- Zones → Cache Purge → Purge
- Zone → Firewall Services → Edit
- Zones → WAF Zones → Edit
- Zone → Bot Management → Edit
- Zone → Analytics → Read
- Click on the domain name Turn on.
- Paste Cloudflare API token.
- Click OK.
3. Proxyed or DNS Only
Proxy mode routes traffic through Cloudflare and hides your server's real IP address, with CDN and protection. DNS only uses Cloudflare for DNS only, no proxy traffic and no IP hiding.
Note: always creates a token with the correct permissions and never shares the Global API Key. If you change your settings on the Cloudflare page, click Refresh status for the panel to pull the latest state.