Redis is an extremely fast in-memory data store that drastically speeds up applications: it caches query results over the database, saves user sessions, and runs job queues. Your Redis instance is private and isolated to your account. You connect to it via the socket path, without a TCP port and without a password.
1. Overview
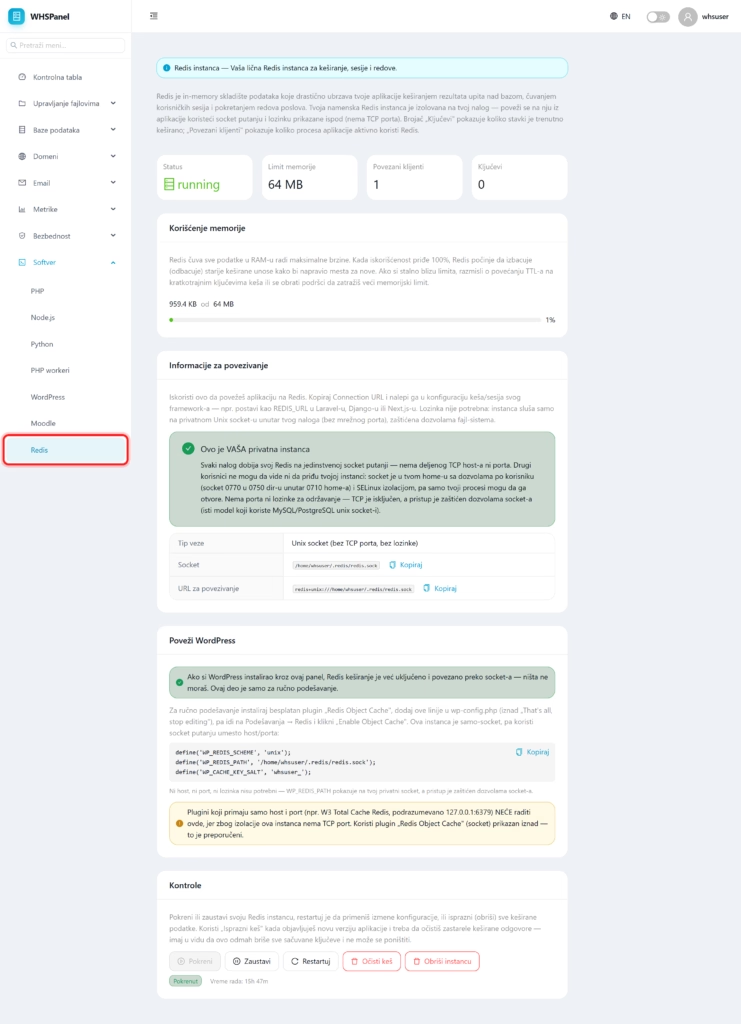
Open in the menu Software well Redis. The tabs show status, memory limit, number of connected clients and number of keys. When memory usage reaches its limit, Redis evicts the oldest cached entries to make room for new ones.
2. Application connection
In the work Connection information the panel gives you socket path and Link URL, with a copy button. The instance listens only on a private Unix socket inside your account, protected by file system permissions (the same model used by MySQL and PostgreSQL). For Laravel, Django or Next.js, you set that URL as REDIS_URL.
3. Connecting to WordPress
If you installed WordPress through the panel, Redis caching is already enabled and you don't need to do anything. For manual setup, install a free plugin Redis Object Cache, add these lines to wp-config.php then in Settings click Enable Object Cache:
define('WP_REDIS_SCHEME', 'unix'); define('WP_REDIS_PATH', '/home/user/.redis/redis.sock'); define('WP_CACHE_KEY_SALT', 'user_');Watch out: plugins that only ask for host and port (for example W3 Total Cache Redis, by default
127.0.0.1:6379) WILL NOT work, because due to isolation this instance does not have a TCP port. Use a plugin Redis Object Cache which works over sockets.
4. Controls
You can use the buttons to You start., You stop. or Restarting instance, yes Clear the cache. (clears all cached data) or yes Delete the instance.. Clear the cache when you release a new version of the app to flush out outdated cached responses. Note that this deletes all keys immediately and cannot be undone.